Billdu Inventory – Track Inventory in Your Smart Device
Ready for some tasty new updates from our Billdu developers? For a long time, our users have asked for a new module and finally, they’ve got their wish granted: Inventory tracking. All your items can now be tracked in regards to their respective remaining amounts. Read on, for a closer look at the new inventory functions included in both the web version as well as Billdu mobile.
Up until now, you could only enter the amounts of your saved items manually. You could see an overview of items and amounts, but each time you issued a new invoice, the item count stayed the same until you – again manually – changed it to reflect the actual amount left. Well with Billdu’s new Inventory Level Tracking, once you’ve entered the starting amount of any item, it will automatically adjust to match the number of items you’ve still got left after issuing new invoices. You can then verify and check all item movements using the history function or – if needed – add or remove an item movement manually as well.
Inventory Tracking on Billdu Mobile
As opposed to some of our other recent updates, this one didn’t get its own section. Our developers simply implemented new functions into the Items section, to make it as comfortable to use as possible and this goes both for the web version as well as the mobile one. The Item section’s grid has been remade, to show each item’s current amount, so you no longer have to open each item up, to check its amount.

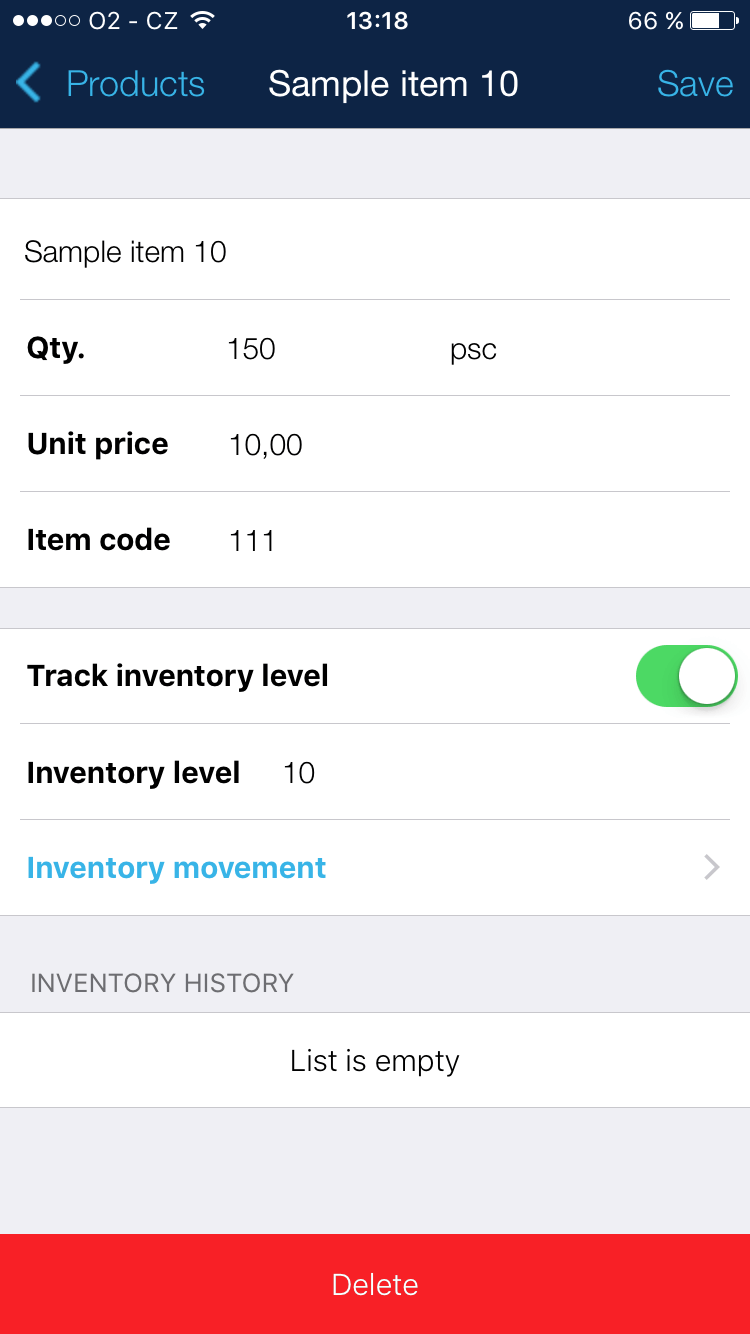
You’ll notice a couple of new things here: firstly a switch to turn on Inventory Level Tracking. This needs to be turned on for each item you intend to track. You can turn this on when creating the item or do it for any existing items you’ve previously created. As long as the Inventory Level Tracking stays on, the amount of that item will be automatically adjusted should the said item be used on an invoice or another document (you might also want to check out how a professional invoice template looks like). You can also add item amount movements manually, should you need to.

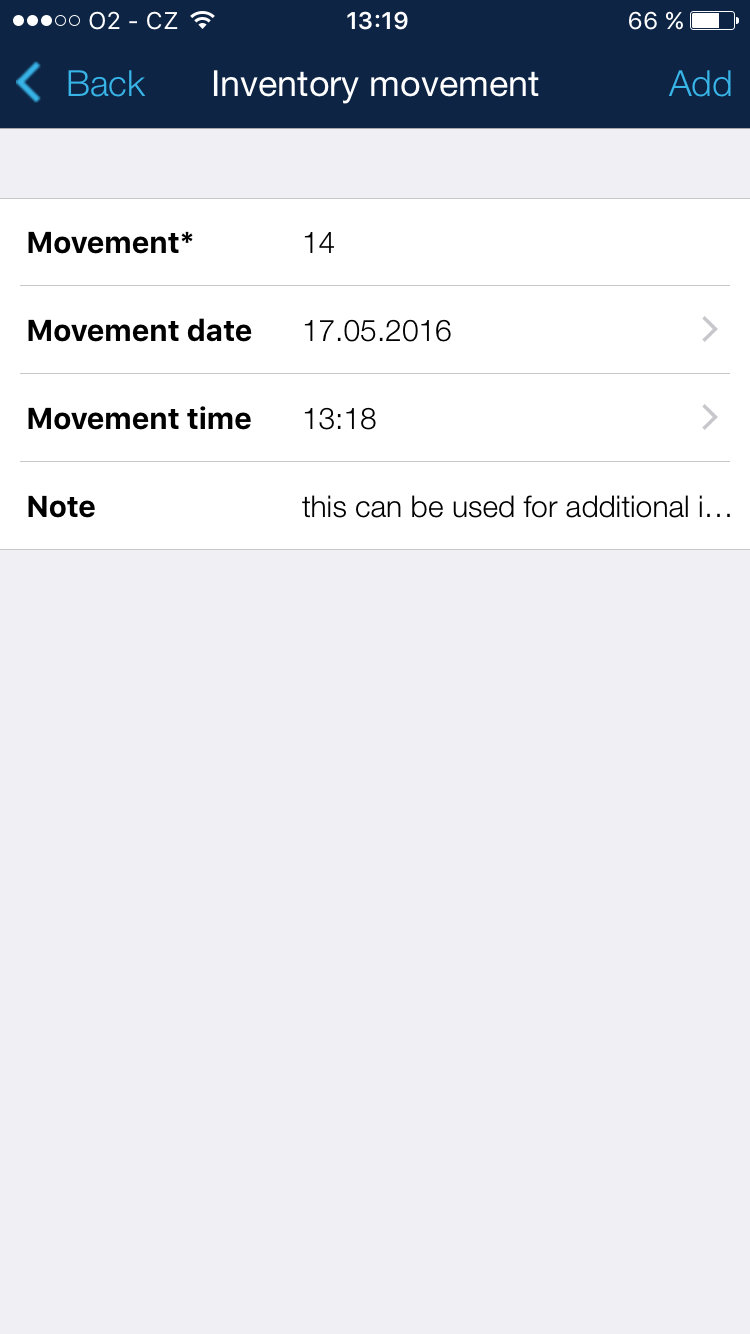
Simply add the amount change that occurred, the date and time of the movement and optionally a note with additional information.
![]()
Every movement – automatic or manually added – will be recorded and shown in the given item’s movement history, where you can verify each one according to its date and time. All changes will also automatically synchronize with the web version once you’re online.
Inventory Tracking on Billdu Web
After opening the Item grid, you’ll notice that the Amount column has been replaced by the Inventory Level column. Here, you will see the amount you’ve entered when creating the item and if you turn on Inventory Level Tracking for it, it will automatically adjust according to your issued invoices.

Here you can see the inventory levels for all items that you’ve previously entered. After turning on Inventory Level Tracking, you can click on the new plus icon in the Actions column to manually add a movement to any given item’s inventory level. This is helpful if there are changes to the amounts of your items other than from issued documents.
![]()
When creating a new item, or editing an existing one, you can turn on Inventory Level Tracking here as well as add new movements to the given item’s amount. Every movement, whether from issued documents or manually added by the user will show up here, in the item’s movement history, as well. In the case of movements coming from documents, you can also open the respective document in which the item was used directly in the item’s movement history.
Whether a new user or old, be sure to check out Billdu’s new powerful Inventory Tracking. You’ll get a clearer overview of the current state of your items and thanks to the automatic nature of the new functions, it will also remain clear for as long as you leave the inventory tracking for a given item turned on. If you have any thoughts on the newest updates, feel free to leave us your feedback in the comments below.
Tags
Related posts


